
- Home >
- Information >
- Go Orienteering >
- Course lengths and difficulty
Course lengths and difficultyHow do I choose?
Courses at orienteering events combine physical activity with navigational challenge. To cater for all ages and abilities can be quite difficult or confusing. Guidance is therefore provided to try and give consistency enabling competitors to identify the correct course when entering.
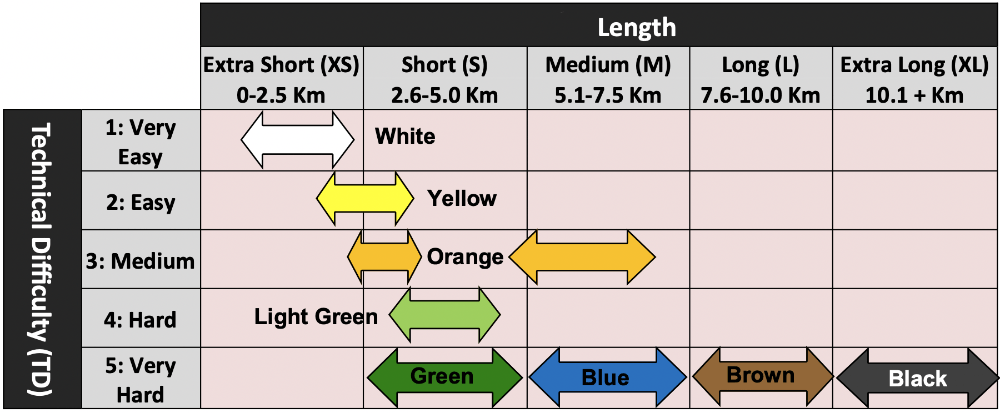
The most common way is to use the nationally defined ‘colour-coded’ courses which provide a range of different lengths (for different fitness levels) and different ‘technical difficulty’ (for skill levels). The general criteria are shown below but you will find some variations including such courses as ‘Red’, ‘Short Blue’ or ‘Short Brown’ at events with a large number of courses or where the area is restricted.
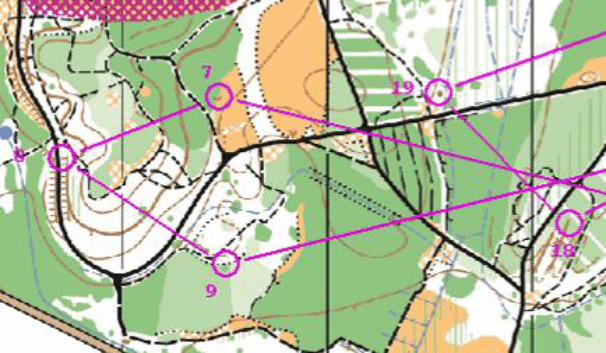
Examples of how ‘technical difficulty’ is determined is shown below. It is not always easy to meet all the criteria.
The table below gives an idea of the relative difficulty of the colours. Precise guidelines can be found in British Orienteering Rules. Although the age of children has been used as a guide for some of the easier courses even the adult beginners would benefit from going round an easier course first just to get the idea of map scale, symbols etc.
| Colour | Technical difficulty | Physical difficulty | Remarks |
| White | 1 | 1 | All on paths, direction of next control always indicated by flag. Suitable for young children of 7 to 8 who should be accompanied. |
| Yellow | 2 | 2 | Routes along obvious line features e.g. earth banks, fences as well as paths. Decision points introduced |
| Orange | 3 | 3 | Controls on features a little way off paths or on line features. Route choice introduced. Adult beginners shouldn't attempt anything harder. |
| Red | 3 | 3 to 4 | Not often provided. Basically a long Orange. |
| Light Green | 4 | 3 | Transitional course for improving skills. Navigation skills required, interpretation of contours |
| Green | 5 | 3 | For those with good navigational skills but with limited energy or running speed |
| Blue | 5 | 4 | Longer than Green and shorter than Brown! |
| Brown/ Black | 5 | 5 | For very fit and competent navigators who are usually 16 plus. |
Technical Difficulty 1: The route is all along tracks and paths with no route choice. The controls are reasonably close together with a control at every Decision Point. Controls are at junctions, crossings or bends on paths or tracks. Features on paths (e.g. bridges, gates) can be used to give variety to the control descriptions. The banner and punches at a control are sited in the direction of the next control.
Technical Difficulty 2: The route can follow obvious line features such as tracks, paths, fences, walls and rivers. A control is not needed at every Decision Point, but there are at most two Decision Points per leg. Some controls may be on point features visible from the line feature.
Technical Difficulty 3: Some controls are not on line features but a route on a line feature to an obvious attack point should be possible. There are simple route choices provided. Controls are on any line feature but also easily found prominent point or contour features.
Technical Difficulty 4/5: TD5 is not often found in local forests as it requires complex navigation on intricate contour features. Both TD4 and TD5 provide significant route choice with TD5 giving changes in techniques—long legs followed by short legs in complex terrain. Courses which are supposed to be TD5 are made as difficult as possible in the area being used